
You've got the touch! You've got the power!
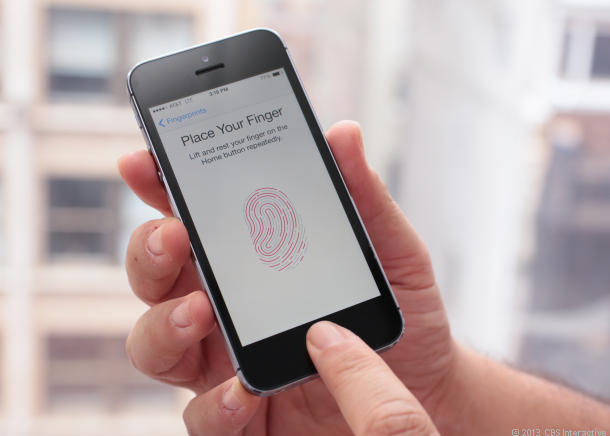

Touch ID is Apple's biometric fingerprint authentication technology. With it, the Home button can unlock your iPhone or iPad, grant you access to secure apps, and authorize purchases with iTunes, the App Store, and even Apple Pay. All by reading and recognizing your fingerprints. In the perpetual battle between security and convenience, where many people would rather go without a passcode or strong password than fuss with anything complicated on mobile, Apple's Touch ID fingerprint identity sensor aims to do for authentication what iCloud did for backup and restore — make it easy enough that people will actually use it.
Note: Touch ID works on iPhone 5s or later and iPad Air 2 an iPad mini 3 or later.
How to set up Touch ID on iPhone and iPad
When you get a brand new iPhone or iPad, it will prompt you during the set up process if you want to enable Touch ID. If you decided to skip that step, don't worry, we are here to show you how to set up your Touch ID and get those fingerprints scanned in.
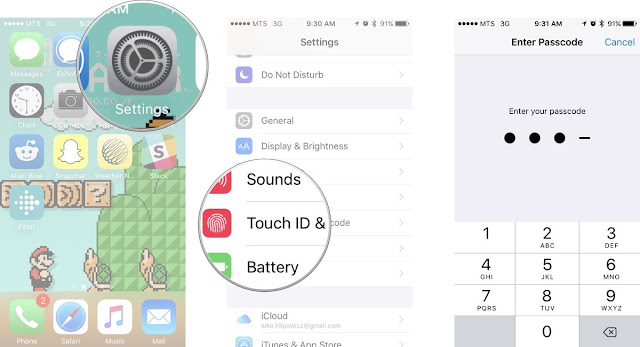
- 1- Launch the Settings app from your Home screen
- 2- Tap on Touch ID & Passcode
- 3- Type in your passcode for authorization. If you don't have a passcode you can skip this step.
- 4- Tap on the Add a Fingerprint button.

From here your device will run you through a step-by-step process to set up Touch ID. This will require you to scan your thumb a couple of times. The whole process takes only a few minutes.
How to add additional fingerprints to Touch ID on your iPhone and iPad
There are up to 5-slots in Touch ID, and you can use them to register your own fingers, a combination of yours and your family or colleagues, You can even temporarily register a travel-mate just in case of emergencies, without having to give them your passcode or password. Best of all, adding new fingerprints to Touch ID is easy.
- 1- Launch the Settings app from your Home screen
- 2- Tap on Touch ID & Passcode
- 3- Type in your passcode for authorization. If you don't have a passcode you can skip this step.
- 4- Tap on the Add a Fingerprint button.


You will be led through a series of screens that will show you how to add a new fingerprint. In just a few minutes you will be ready to rock!
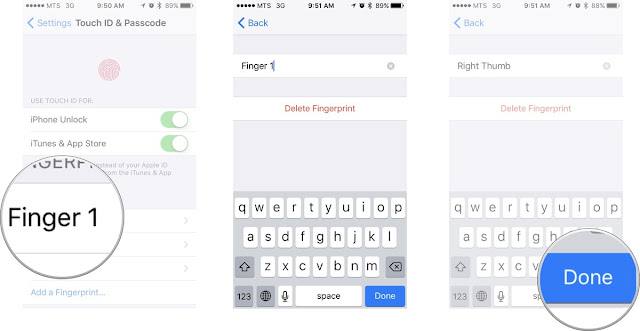
How to label a Touch ID fingerprint
Once you've registered a few fingerprints, however, the default labels Touch ID assigns them are pretty much useless when it comes to figuring out which is which. That's especially true if you've registered a family member's fingerprint so they can share your iPhone. Luckily Apple does let you rename Touch ID fingerprint labels to make them much easier to keep track of and trouble shoot later!
- 1- Launch the Settings app.
- 2- Tap on the Touch ID & Passcode button.
- 3-Type in your passcode when asked.


- 4- Tap on the Finger you want to rename
- 5- Type in a new, more recognizable name for your fingerprint. (i.e. right thumb.)
- 6- Tap on the Done button.
- Repeat the steps 4-6 until all your fingerprints are labeled.
How to delete a fingerprint from Touch ID
If you have given someone fingerprint access to your device for an emergency, or for a specific reason, and you don't need that person to have access anymore it's a good idea to delete their fingerprint. Also, if a fingerprint becomes glitchy, you can remove it and redo it. That's because deleting Touch ID fingerprints is even easier than adding them!- 1- Launch the Settings app on your Touch ID capable device.
- 2- Scroll down and tap on Touch ID & Passcode.
- 3- Type in your passcode when prompted.

- 4-Now tap on the fingerprint you'd like to remove. Try renaming them in the future in order to make figuring out which ones are which easier, if you haven't already.
- 5- Now just tap on Delete Fingerprint.
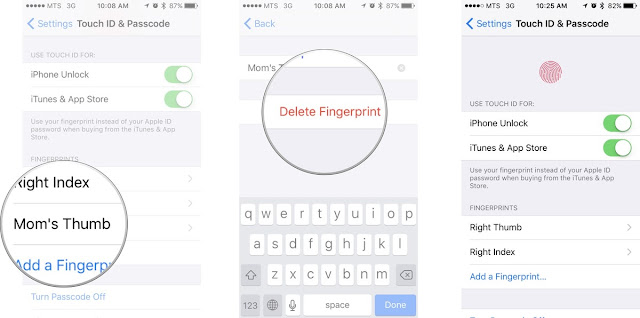
- That's it. Just delete each print you don't want in the same manner. Then start over with Touch ID again.
How to turn off Touch ID for the Lock screen
Whether you simply don't like or trust biometrics, or it's just not right for your current situation and circumstances, Apple makes it easy to turn Touch ID off and a passcode or strong password on.- 1- Launch the Settings app from your Home screen.
- 2- Tap on the Touch ID & Passcode button.
- 3- Enter your passcode when prompted.
4- Tap on the On/Off switch for iPhone Unlock option.
How to turn off Touch ID for iTunes and App Store purchases on iPhone and iPad
If you've registered other family member's prints and you don't want them to be able to buy things on your account, or if you're just not comfortable with Touch ID purchases, you turn off iTunes purchases and not have to worry about it.- 1- Launch the Settings app.
- 2- Tap on Touch ID & Passcode.
- 3- Type in your passcode when prompted.
- 4- Tap on the On/Off switch for iTunes & App Store option.

- You're done! Now both iTunes and the App Store will ask you to enter your password the regular way again.Are you using Touch ID? Let us know why or why not!


0 comments:
Post a Comment